

Update Oct 2017: PicMonkey no longer offers a free level for their online design service (whamp whamp). However, they do offer a free trial, so you can still follow the directions below to design your transparent watermark, and, if you’d like to keep using it, annual membership for their service is $3.99 per month. Kind of a bummer, but still a great service for quick online photo editing!
Having a transparent watermark is great. You can put it on photos you create for social media platforms to amp up the professionalism and ensure your business continues to be branded when your pics are shared.
I find that the easiest way to do this is to use one of my favorite online photo editing tools, PicMonkey.
Here’s the sequence:
1) Go to www.picmonkey.com, choose “Design” and select “Square”.

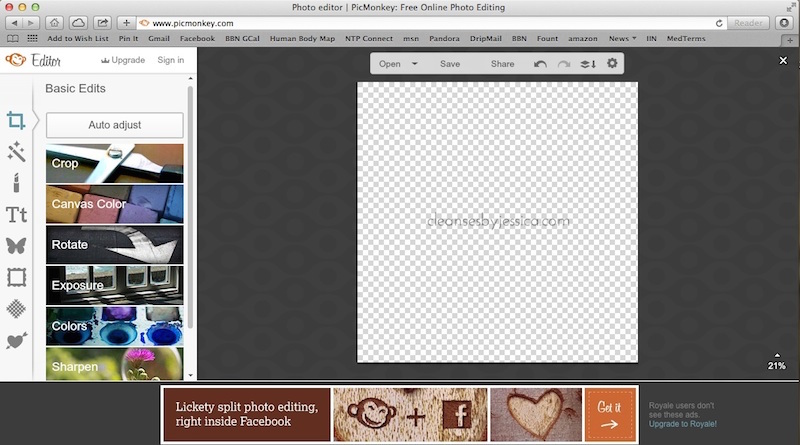
2) It should bring you to the option for “Canvas Color” upon opening. If not, you can find it in “Basic Edits”.
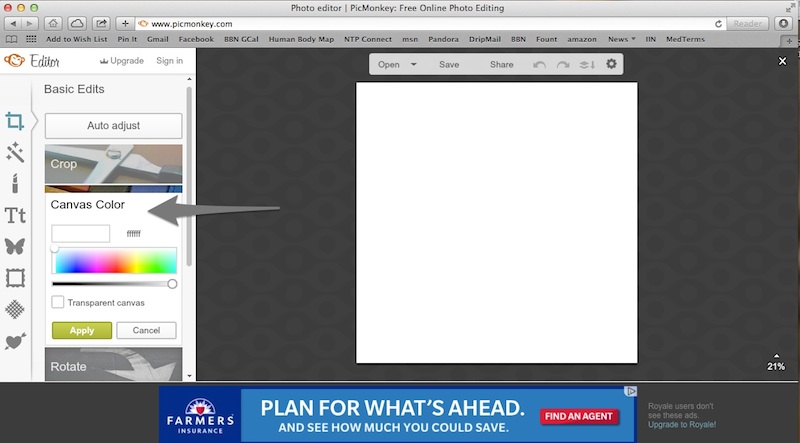
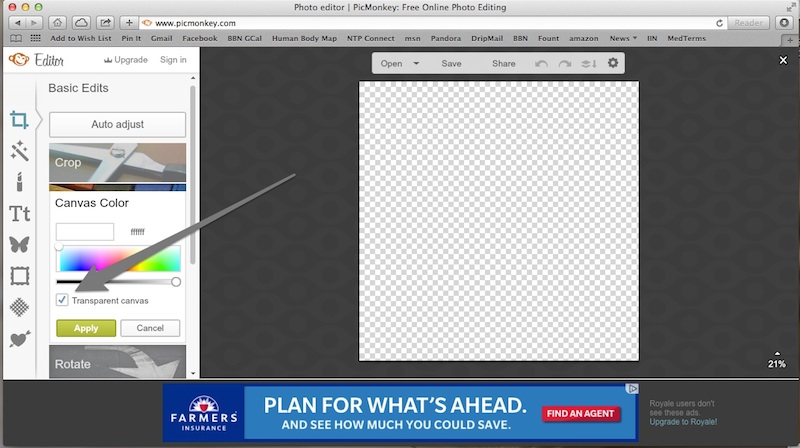
3) Click the box for “transparent canvas” and click “Apply”.
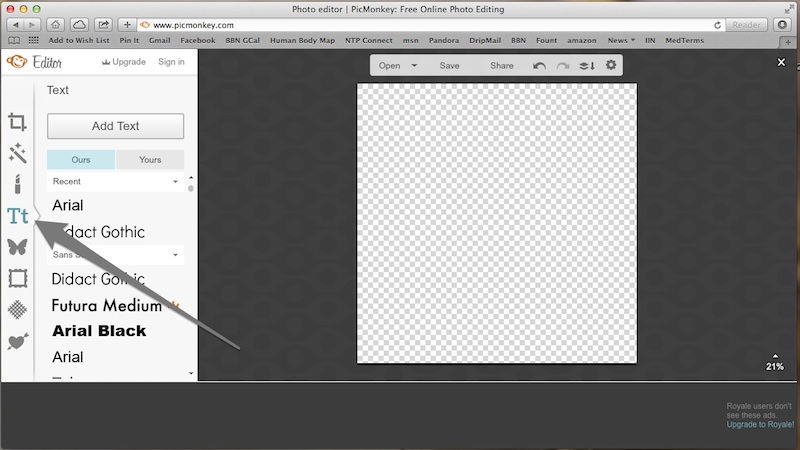
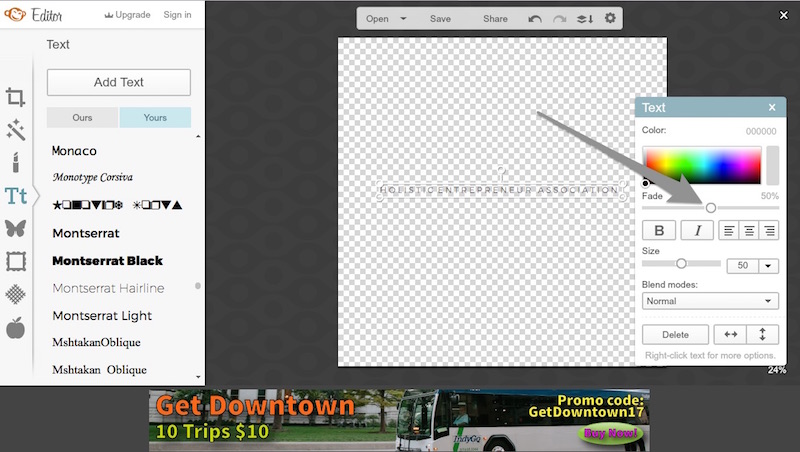
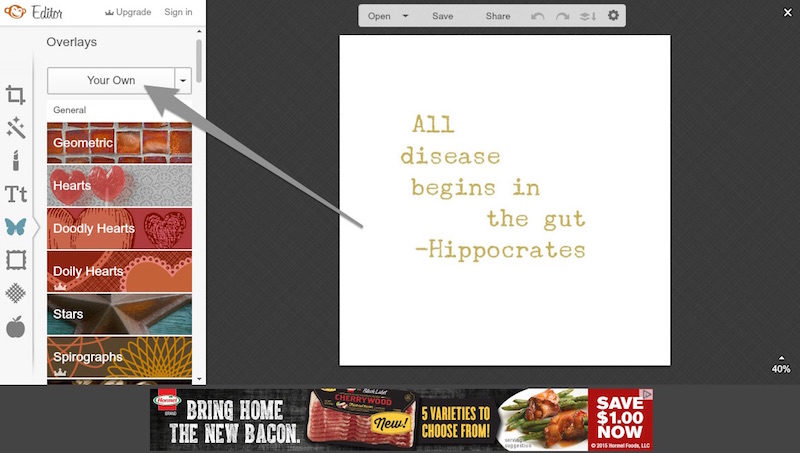
4) Next, select the Text option.
5) Click “Add Text” to create a new text box.
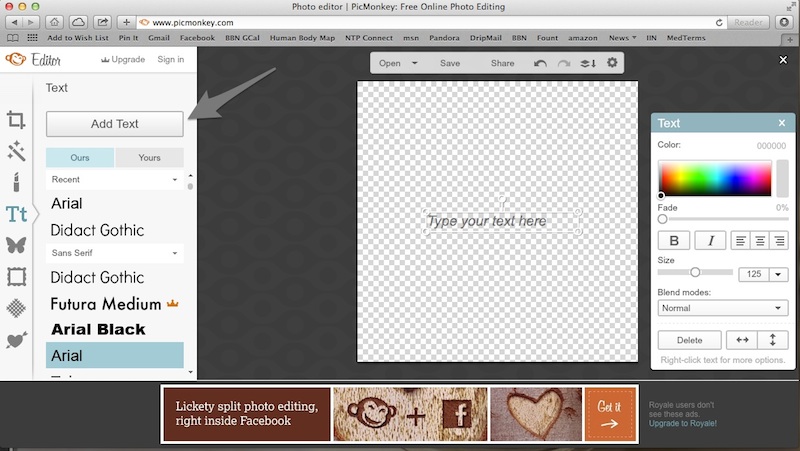
6) Using their selection of texts or your own (find them under “ours” or “yours”), enter your text to create your watermark.
Notice that you can also use the Fade slider to make your text lighter.
Note: If you have a logo and would prefer to upload that rather creating a text watermark, go down to the butterfly icon, which will allow you to upload your own “overlay” over the transparent background. Upload your logo to use as that overlay and continue with the next step.
7) Now we’re going to crop it so that it’s easier to handle when you’re using it.
Select the “Basic Edits” option (the top right box icon) and select “Crop”.
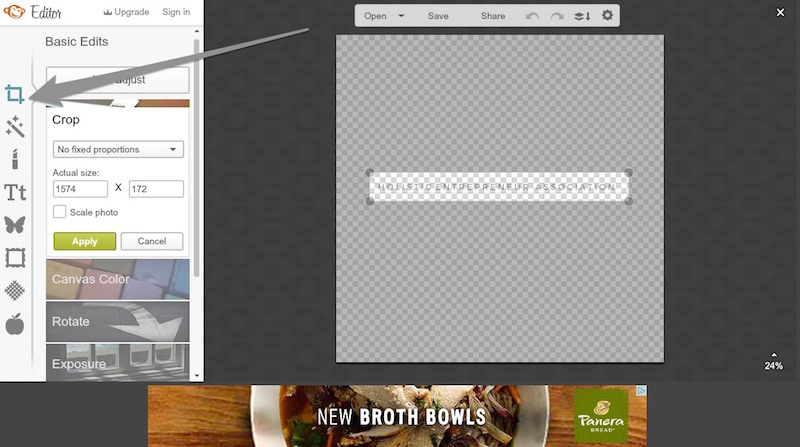
8) Crop it to fit your logo & click “Apply”

10) Click “Save” and save it to your computer.


And there you have it! You’ve just created your own watermark.
Ok, so now what do you do with it?
Here’s how to add your watermark to a picture:
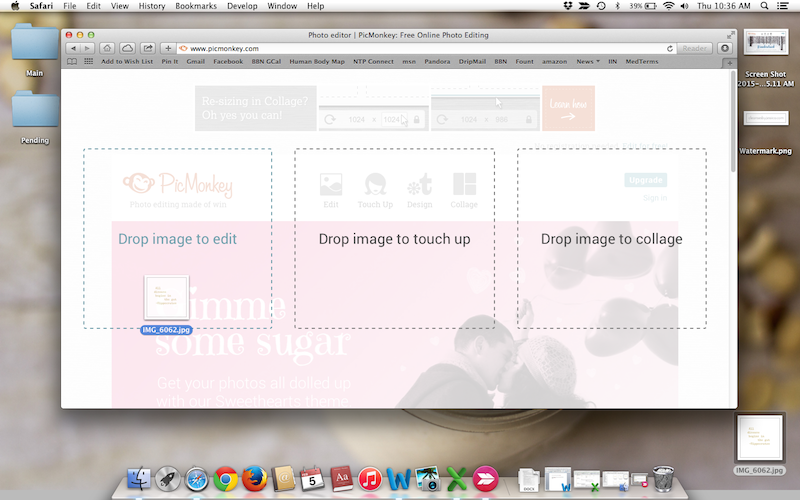
1) Open up a new tab for picmonkey.com and click and drag the picture you’d like to place the watermark on into the “Drop image to edit” field.
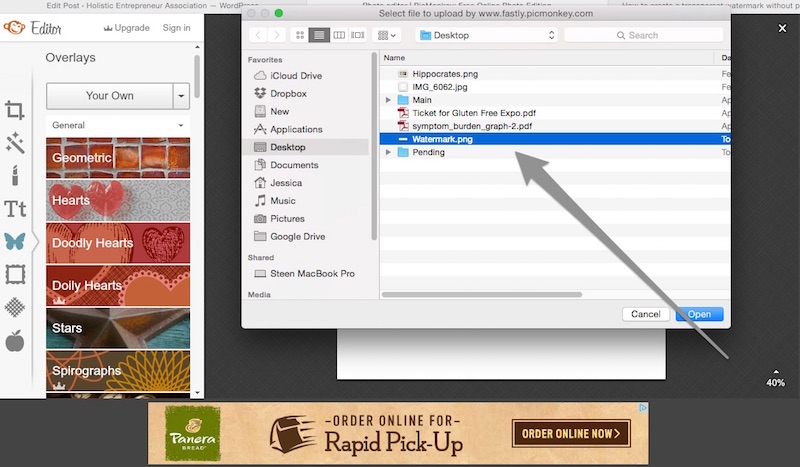
2) Next, select the “overlays” option (the butterfly icon)
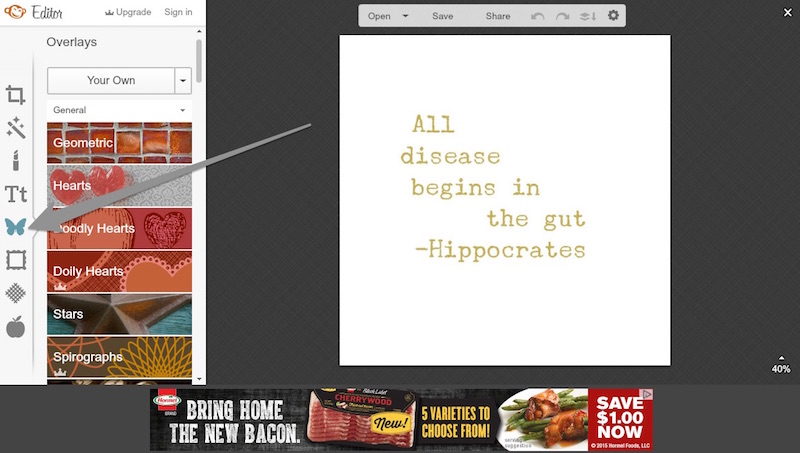
3) Choose the “Your Own” option.
4) And select the watermark you’ve just created.
5) Position the watermark on the photo.
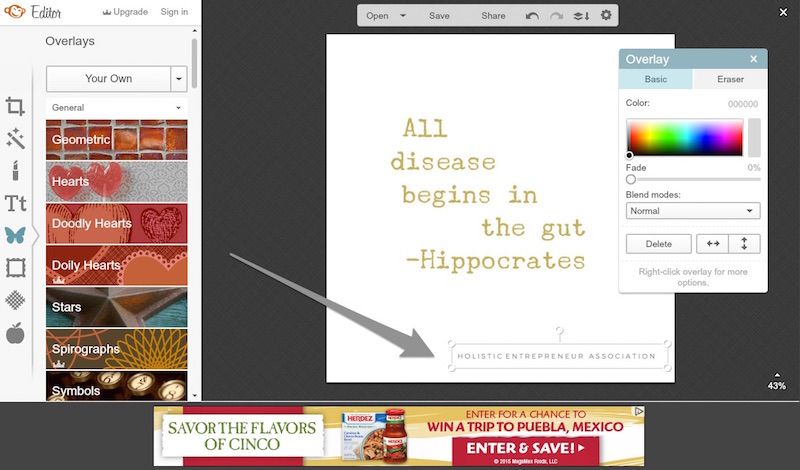
6) Save the photo to your desktop and you are done!

Pretty easy, right?
Now you can use that watermark to put over all of the editable quotes I give out on Freebie Fridays.
Enjoy!
ALL my best,

![]()


